
The time has come – drumroll please: Ms. Tina Gisante, you were drawn as the winner for our giveaway! Please e mail us at team@platinumpeacock.blog with your address so we can send you the Nuvo gift package! Congratulations! We look forward to sending your crafting goods to you! 🙂 We would like to say THANK YOU to everyone that participated for our first prize drawing – it’s meant a lot! In fact, we had so much fun with comments from new & current YouTube subscribers that we will be doing a drawing for a giveaway each quarter for crafty goods! So, this Summer we’ll have another prize package! Many fun things will be going on so stick with us as we really do value each & every one of you. Stay crafty, my/our friends!
Month: April 2017
Nuvo Info
Please know & understand that to WIN the Nuvo package, you MUST SUBSCRIBE to the blog &/or YouTube! We’ve tried to make things as easy as possible but “liking” on twitter or leaving one here won’t provide an entry to win. If you’d like, you can enter by signing up for a new subscription here on the blog &/or adding PlatinumPeacock to your YouTube subscriptions! So, a new subscription to YouTube & to our blog = two entries. We want everyone to enter if they wish to! The deadline’s quickly upon us! One more full weekday! P.S. Did you know that we even try to give you ideas for the inside of the card so you have something to write when you get stuck? Yes, we really try to think of any kink that may arise while making cards, girts, paper crafting, etc.
Banner Birthday Card
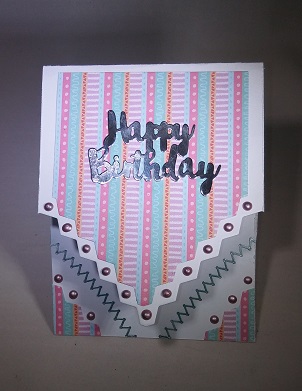
NOTE: There is a video of the process of making this card below. We have tried to be as thorough as possible with this and it’s not that complicated to make, really! The Birthday Banner Card is fun to make & really unique. Adults & children have liked this one so it may be a good idea to tuck 1 or 2 of these in your card stash! The base for the card comes in at 5.35 inches in length by 4 1/4 inches in width. Of course, I used a top fold card design for this example. For the patterned paper, the measurements I started with are 3.75 inches in width by 4.5 inches in length.

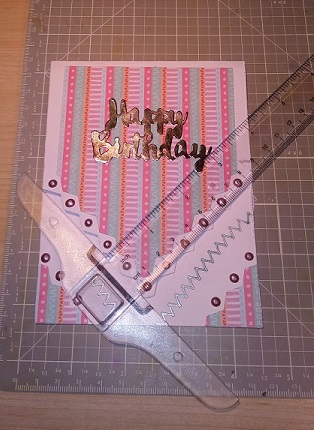
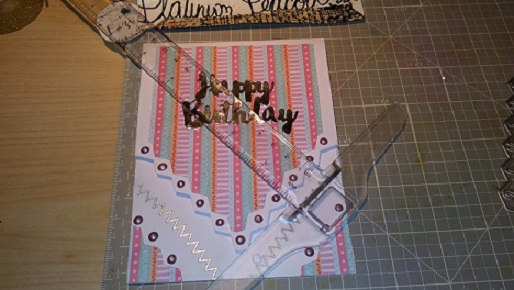
We wanted to try to come up with a use for the “Spring” die and this was where a bit of experimenting took us. Use the top portion of your card base and paper of your choice to cut each side at the same time. That helps with your alignment later when it’s time to assemble your card. Here are a couple of pictures with the T Square ruler on a 12×12 inch mat:
Adhere printed paper once you’re happy with the angles that were cut from the spring die. We colored white stitch peel offs, added Nuvo Drops and adhered the cut portions to make corners from the bottom. Add your sentiment and you have a fun banner card!
Nuvo Giveaway!

We’d like to thank everyone for all of the support by announcing an exciting giveaway!What are we giving away? Nuvo Mousse in Lilac, Nuvo Mousse in Copper & Nuvo Glitter Drops in White Blizzard. All are new and each mousse container is sealed. (We happen to own and love these colors so we used our products so you could see them on watercolor paper.)
HOW TO WIN: Subscribe to PlatinumPeacock’s YouTube Channel (click here ) or follow our blog (click the follow button in the lower right hand corner of this screen) to enter for a chance to win. Yes, you can do both to double your chances! Contest starts 4/15/17 and ends at Midnight EST (U.S.) on 4/23/17. Let the games begin & stay crafty my friends!
Heat Embossed Butterfly Card

Ready to use your stash a bit differently? Try our heat embossed #sprayembossingpowder technique for a refreshing take on heat embossing that allows you to enjoy crafting more, too! We allowed SOME of the granules of embossing powder to stay on the card & melted them on, taking full advantage of the texture and shine of the melted powder. We used 3 butterfly stamps from LovefromLizi but any stamps would work for this. This technique works for larger sentiments with brush lettering or a die cut sentiment because of the building up of a few layers of embossing powders, tiny sentiments may not be as easy to read. It never hurts to try a heat embossing a stamped sentiment on scrap paper using this technique to see how it works for you. You many be surprised! Or, you can simply die cut your sentiment out of specialty paper to add after you’re done with embossing like we did. The effect is fun, easy and unique. This card was in our 10 cards, 1 kit video but we wanted to cover the technique more thoroughly here:
Mixed Media Made Simple


We know many people are intimidated by the thought of Mixed Media but really, it’s crafting with another material besides paper… Some argue that it’s any other type of substrate or material, medium with as little, if any, paper at all. At Platinum Peacock, this argument about how much, if any, paper is allowed creates unnecessary confusion.
What is one to do? We don’t believe in crafting commandments but guidelines, such as odd numbers tend to look best. So, ratios of how much paper is involved doesn’t concern us too terribly much. There are some wonderfully talented mixed media artists out there but never forget that you are in charge of your creative journey. So, experiment a bit with us and see what you like. We have a fun, affordable, easy and fast card idea using mixed media principles. You can add as much detail as you’d like, as you see above in the pictures. The tag is card #10 in the video below:
