Music Stand Card


In this installment we used elements from the Love from Lizi March card kit to create a card that replicates a wooden music stand from an old piano.  We used Dovecraft cocoa brown ink to cover the entire front of the card to create the wood look.  We tore up some of the music note paper from the kit and inked the edges.  We backed the paper with fun foam to add dimension.  We used twine from the kit to make a bookmark and added a silver heart we cut by using a Lawn Fawn die.

On the inside we added a “Just a Note” embellishment that we made using a Lawn Fawn die and a “With Love” sentiment from the March Lizi kit.  We underlined both using an oval white line peel-off from the Lizi Kit.  As a finishing touch we added a heart die cut (from the January Lizi kit) that we positioned over the top of the back of the card like a paperclip.  A demonstration of how to make this card can be found in the video below:


Please be sure to subscribe to our Youtube channel to see future projects and subscribe to our blog for all our latest updates.  Stay crafty my friends!


The No Cardstock Card

Take your Love from Lizi card kit to the next level with this clean & simple design. No cardstock left?  No problem.  We used the empty box that the March Lizi kit was shipped to us in to cut out a piece of cardboard to use as the card’s base.

We blended 3 colors of Nuvo Mousse to create the watercolor finish on the front of the card.  We used a Just for You sentiment from the March Lizi kit.  The butterflies were cut using dies from the same kit.  For instructions on how to make this unique card check out the video below.


Mixed Media meets Art Deco

MM1

An easy, cheap or dare we  say FREE and easy way to dive into mixed media is by using newspaper and magazine articles to create a dry decoupage. Dry decoupage? Yes, if you have any type Xyron, it works great with torn and ripped pieces from a magazine and/or paper – using both gives you different colors of paper to apply to your cardstock. However, if you do not have any Xyron machine, you can use a tape runner, scor-tape, etc. We liked the look of the varied colors from the combination of magazine and newspaper, so we did a couple of layers so the background didn’t look flat. Then, we used a geometric stencil, Ranger Texture Paste, and an artist spatula set to smooth out the paste on top of the stencil. A knife or spoon from the kitchen will work – just keep whatever you use out of the kitchen afterwards! 🙂 We added a frame, a bit of silver mirror cardstock, “Happy Birthday” peel offs, a black Sharpie, and Nuvo Drops, all from LovefromLizi (except for the Sharpie). On the inside we use silver peels offs from LovefromLizi to maintain the classic black, white, and silver scheme for anything deco!

We’re beginning to explore mixed media more and thought this was a good staring point as you may have everything needed to achieve this look, or close to it, depending on your personal taste. The stencil can be any shape, of course, we just always try to do at least 1 male card a month. Love from Lizi’s had 300 GSM paper this month, so we did use that & it worked beautifully but you could use watercolor cardstock or anything with heft. Stay tuned this week: Getting more from you inks and everyday materials, Shabby Chic cards for the ladies and another card for the gents! It’s going to jam packed with creative ways to get more out your supplies with beautiful results. We’ll be posting throughout the week on Facebook, twitter, and Instagram. The video below takes you step-by-step with instructions. Stay crafty my friends! P.S. If you’d like to add color and shine to a project like this, check out our Nuvo Mousse video.


How to use Nuvo Mousse

We have been busy putting nuvo mousse to the test! What makes nuvo mousse different as opposed to other embossing pastes or mixed media products? Well, we set out to answer some of those questions with the hope of a fun video helping you! Nuvo mousse is made by Tonic, and it comes in an array of colors with shimmer. Unlike other embossing pastes/wax of the not too distant past, you do NOT have to worry about contamination if you use your fingers for application from the jar to paper. Actually, nuvo mousse is perfect for using your fingers for quick crafting or mixed media; however, you may use spatulas if you’d like. It’s a smooth, creamy paste but it can have texture. It’s a unique product we purchased from lovefromlizi.com & some colors from Amazon.com. We tried some “typical” crafting techniques, but we wondered about other possibilities. Some of things tested in this packed & interesting video: embossing/heat tolerance, mixing colors, coverage, DIY paints and sprays, lettering, etc…. HINT: You never know how things will turn out! Also, keep a few baby wipes around to clean hands, spatulas, brushes quickly. Have Fun & enjoy your weekend! Stay crafty, my friends!


Secret Garden Card

With Spring just around the corner we decided to present what we are calling our “Secret Garden” card.  The front features a wooden door look with a key hole.  We used a Crafters Companion wood grain embossing folder to get the wood grain look and texture.  We then used Dovecraft pigment ink in Natural (from the Love from Lizi) & Distress ink to give the wood some color variation. We used tag dies to create the layered elements of the lock.  The screw heads were made using copper penny Nuvo Drops (see our How to Make Your Own Embellishments with Nuvo Drops post for more details).

To finish off the front we used a key die from the February Love from Lizi kit to cut silver mirror card (also from the kit).  We then used ribbon and a wooden butterfly embellishment from the February Lizi kit.  We lightly inked the butterfly with Berry Purple Dovecraft ink (also from the kit) and placed a drop Pink Champaign Nuvo Glitter Drops in the center.  Than, we added the antennae on the butterfly using silver vine peel offs from the February as a finishing touch.

On the inside we used some beautiful floral paper from the February Lizi kit.  We added grass using colored pencils.  We used more Nuvo Crystal Drops to highlight the centers of the flowers.  Finally we fussy cut some butterflies from a page of paper from the Lizi kit. For details & easy step by step instructions, please refer to the video:


We hope you’ll try this card for someone special in your life!


Making Embellishments Using Nuvo Drops

nuvo

Nuvo Crystal Drops are a unique alternative to more expensive embellishments.  The bottles go a long way and you can mix the colors to create your own look.  The video below shows some ideas on how to use Nuvo Drops to make your own embellishments.

You can find an assortment of Nuvo Crystal Drops at the Love from Lizi store by following this link: http://lovefromlizi.com/t/nuvo

For more tips on card making and craft projects be sure to subscribe to this blog and our YouTube Channel.  Stay crafty my friends!


Take Life by the Horns

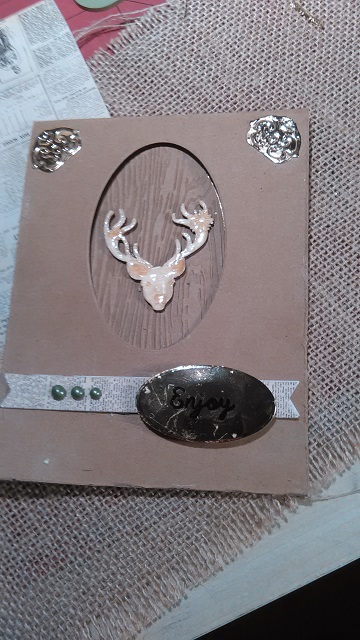
We decided to change things up for this post.  Rather than our usual card tutorial, we took an 8×8 card idea and made it into a DIY home décor item. It’d also be great in a dorm or office!  The theme of this piece is dedicated to Ms. Elizabeth John (a.k.a. Love from Lizi) who has truly taken life by the horns and started a successful business on her own.

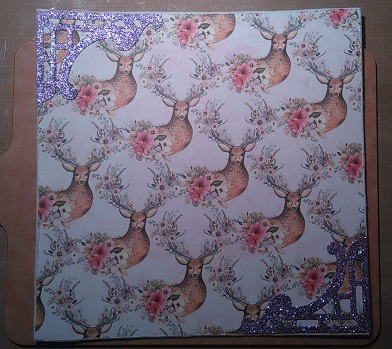
To start with, we took white card stock and cut it into an 8×8 piece to form the base.  We then cut a piece of fun foam into an 8×8 square and layered it on top of a Crafters’ Companion construction cardstock base to give the piece some depth.  The final step of this first stage of the project was to cut a piece of the pretty and unique stag pattern paper from the Love from Lizi February kit into an 8×8 square.  The picture below shows us adhering the paper the fun foam:

Next we used a corner die to cut purple glitter paper from the Love from Lizi February kit into two corner pieces.  We then adhered them to two diagonally opposing corners as shown below.

horns3

We continued by adding gold peel off sticker letters from the Love from Lizi December kit to form the words “Take Life by the Horns”. We highlighted the letters using a black fine tip Sharpie and bracketed the word “Life” with two horns that were hand cut from scraps of purple glitter paper.  Next we added Antique Rose Nuvo drops from the January Love from Lizi kit in the cut outs of each corner piece and then Pale Gold, Pink Champaign, Antique Rose, Rosewater, and Golden Sunset Nuvo drops throughout the flower centers of the paper. Just have fun adding little dots – pink and gold colors help make everything pop with color and a dimension.

We added 3 butterflies that were made by fussy cutting paper from the February Lizi kit and then layering them up to add dimension. (We did 2-3 layers per butterfly but 1 is just fine, too!) We gave them a finishing touch by adding gemstones in the center from the November 2016 kit – the last bling survivors from that kit!

Finally, we punched two holes at the top of the piece and used our Crop-a-dile to inset two metal grommets.  We finished by cutting to length some ribbon from the February Lizi kit to use to hang the piece.

To get future Love from Lizi kits or to buy individual elements to make projects similar to the one above, please visit the Love from Lizi store by clicking the link below:

http://lovefromlizi.com/products

Lastly, Lizi is sponsoring a blog hop of which this blog is a part – #LFLMarBlogHop .  She is giving away a free kit or 20 British pounds to spend in her store.  To enter for a chance to win please leave a comment on this blog and all other participating blogs on the list below.

Love From Lizi – https://lovefromliziblog.wordpress.com/2017/03/01/lfl-spring-blog-hop/


Crafty not Shifty – https://craftynotshifty.wordpress.com/2017/03/01/spring-has-sprung-love-from-lizi-blog-hop-giveaway


Caren With A C – http://carenwithac.com/2017/03/01/love-from-lizi-march-blog-hop/


Handmade By Renuka – http://handmadebyrenuka.blogspot.com/2017/03/3d-frame-card-tribute-to-all-3-love.html


The Little Craft Cave – http://thelittlecraftcave.blogspot.com/2017/03/spring-has-sprung-love-from-lizi-march.html


Ricaura Creations – https://ricauracreations.wordpress.com/


Crazy Paper Chick – https://crazypaperchick.wordpress.com/2017/03/01/love-from-lizi-march-blog-hop-spring-themed/

We strongly encourage you to visit all the blogs because you will find some great projects by some very talented Designers & Guest Designers there.  Stay crafty my friends!


Stag Card


stag1

This one’s for the guys! We made this fun Stag card from the February 2017 LovefromLizi.com. The kit, as a whole, was feminine but we found a few of ways to add even more options for crafting from Lizi’s kit. Once we came out of shock from all of the beautiful papers, tags, glitter dots, and wood veneer accents – including the stag shown- we got to work!

We’ll walk you through each step in the video below:

BE SURE to check our blog on March 1st for the first LovefromLizi Blog Hop!!! You’ll have a chance to win a LovefromLizi kit OR 20 British pounds worth of products from the one & only LovefromLizi.com store! A chance for unique & fun crafty goodness for free? Oh yes, my friends! Who doesn’t love that around this time of year?

—We have begun a page for messages for the inside of your card(s).— May we suggest having a bit of fun with the message inside of this card? Steer your own path.

Three Quick Card Ideas

In this post we present 3 new card ideas.  The first is a love-themed card perfect for any occasion where you want to give something to that special someone in your life.  It uses papers from the Love from Lizi January card kit.  The two embellishments that frame the diagonal love banner were made by cutting Lizi paper using an Anna Griffin die.  Lastly, three Nuvo drops provide the finishing touch in the lower right corner.

The second card also uses elements from the Love from Lizi January kit.  A beautiful foiled paper matted on a simple craft card forms the base.  The feature element is an over-sized craft tag that is wrapped in a doily to form a pocket.  You can use the pocket to insert a journaling tag like the one shown to write a special message to your intended recipient.  A Happy Birthday gold sticker and three Nuvo drops finish off the card.

The final card is a whimsical cloud card also made using elements from the January Lizi kit.  The white card stock was inked and blended to create a stormy sky look.  The clouds were hand cut from white card stock and two of them were raised up using foam squares to create some dimension.  Silver peel off stickers were used to create a rain element with mirror card die cut hearts and small pearl hearts forming “drops”.

Instructions on how to create all three cards can be found in the video below:


Please be sure to subscribe to our YouTube channel for more card making ideas.  Stay crafty my friends!

Valentine’s Day Card Tutorial 5

This edition features instructions on how to make 2 more Valentine’s Day cards.  The first is a gate-fold card using embossed paper that has been sanded to bring out the detail of the arrow pattern.  An inked heart embellishment serves as the center piece.

The second card uses a floral pattern paper that has been inked to give it a watercolor appearance.  The upper corner has a die-cut heart that uses two styles of paper.  The gold insert in the heart came from scrap pieces from a previous die cut.  The sentiment was made by cutting paper from the Love from Lizi kit with a die and then accenting it with two Nuvo drops.  Both cards were made using elements from the Love from Lizi January2017 card kit.  Detailed instructions for making both cards can be found in the video below:


To see more videos like this, be sure to subscribe to our YouTube channel.  Stay crafty my friends!